

Technical articles have been around us for more than a decade now (not kidding) however I still feel that most of them explain concepts and document code in a way that leaves readers still searching for what they came looking for in the first place (duh). Many readers probably find going back to that dreadful thread on StackOverflow 😥 rather than reading the article😪. Therefore, this article will be short, crisp, to the point in nature, and will cut to the chase almost everywhere without much storytelling to back it up, so for any detailed explanations regarding anything please help yourself with the greatest invention ever aka google.
Who is this tutorial for?
Since not everything is explained in detail this article would usually be engaging for people meeting the following conditions -
- Have a basic understanding of how terminals work either in Linux or git bash terminal in windows this tutorial works on both.
- Can search on google any issues they encounter while following this tutorial because come on are you really a human if you don't google?
Link?
Since I want you to concentrate 100% on understanding the concepts rather than thinking about where is the code here is the link to the code for everything I have discussed in this article -
github.com/Praful-Prasad/elasticsearch/blob..
What is elasticsearch?
Consider Elasticsearch like a database that doesn't force you to store data in rows and columns. You can search data in it at a much faster speed and it has several other benefits which you can study in detail online.

How to install elasticsearch?
There are many ways to do it but I recommend the docker way because it just makes your life easier🐬. Again, beginners can search more about docker online and set it up, trust me it will turn your life from miserable to bearable at least. Once you've done that open up a new terminal, you can use this command to run elasticsearch as a container -
docker run -d --name elastic -p 9200:9200 -p 9300:9300 -v docker.elastic.co/elasticsearch/elasticsearch:7.6.2
NOTES to keep in mind -
Above docker command will make elasticsearch accessible on localhost:9200 and I'll be using this only throughout the article.
Also I will be using curl commands to play with elasticsearch. [Curl helps in connecting to any API or sending and receiving data over a network]. So kindly take the pain of converting the curl commands to the programming language of your need.
The images are self-explanatory so please find the explanations in the images only.
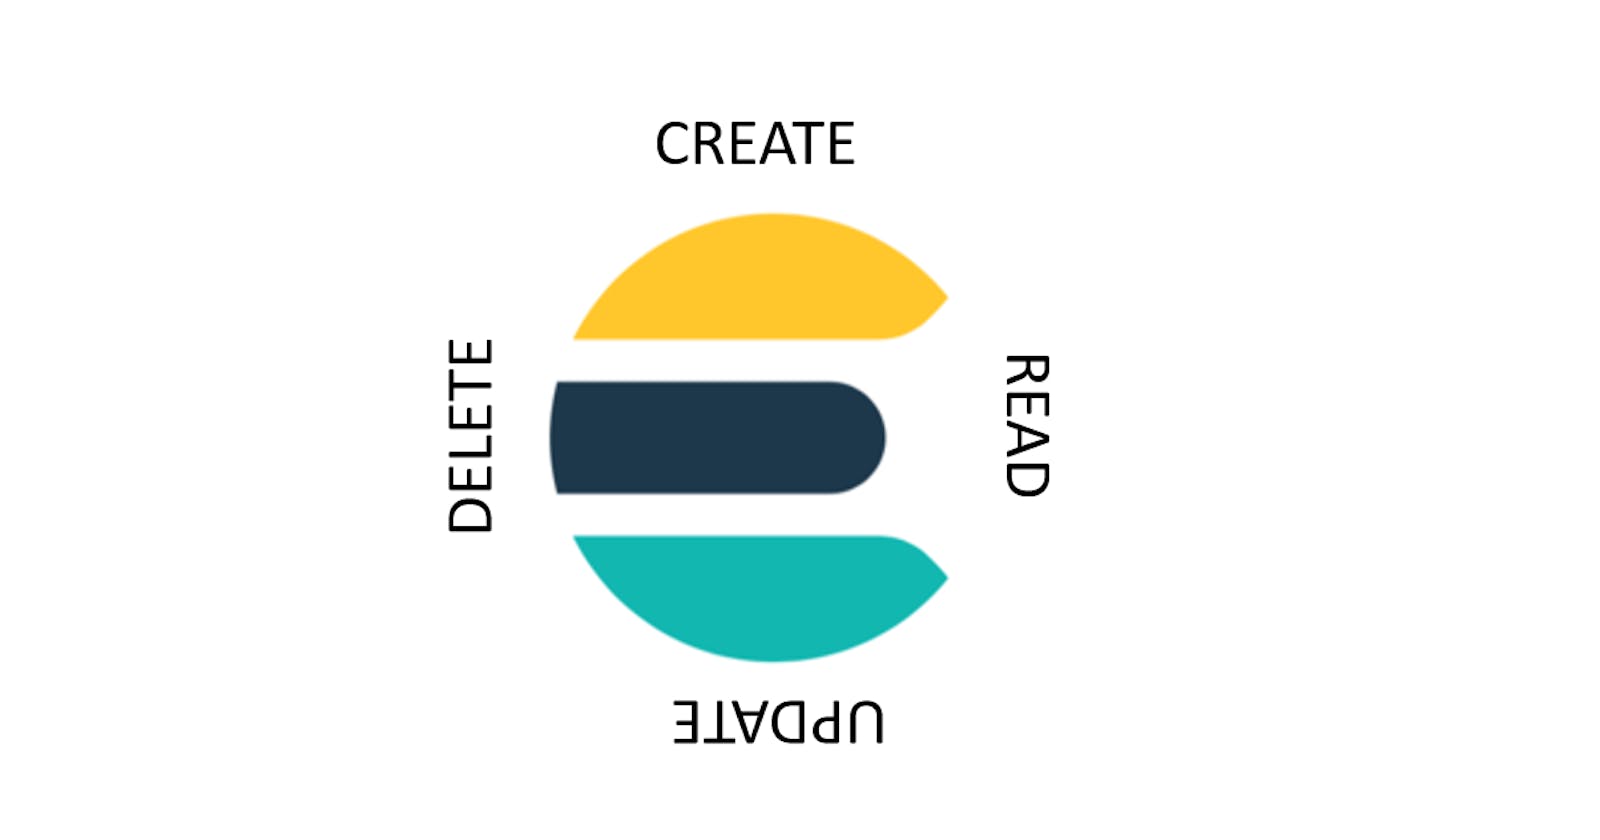
GETTING STARTED WITH INSERT, DELETE, UPDATE AND READ DATA -
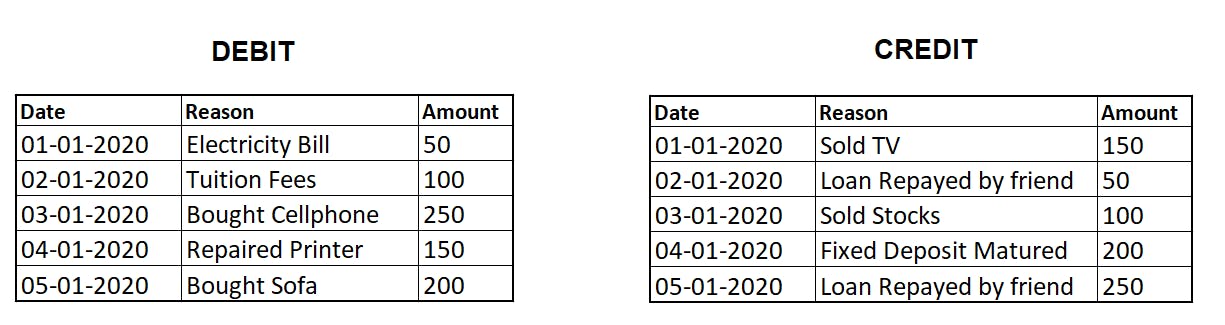
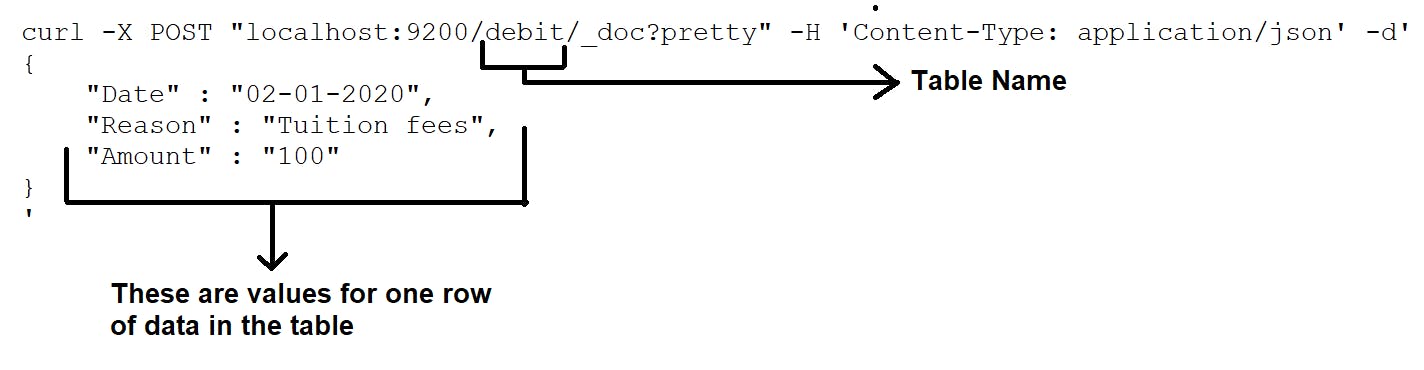
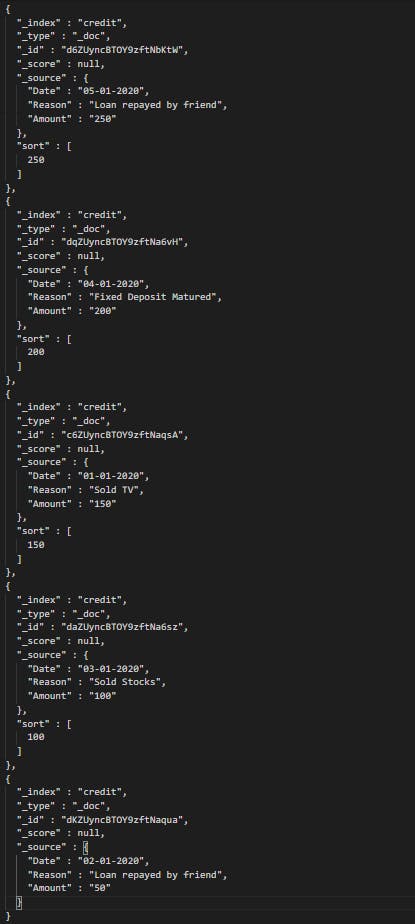
Today we will connect our tutorial with a real life case. Lets say that you have a bank account in which you have transaction details for 5 days.
Now transactions can either be credit (Money coming into your account, chaching!😄) or debit (Money going away from your account, Boohoo☹).
NOTE: - The examples shown for debit can be followed for credit similarly.
I have made the following transactions table for us to follow -
1. DELETE -
I bring this first because we don't want previous data to be there in the index that we are going to create. If you are doing it for the first time it will obviously not be there but if you have worked on this we don't want to take any chances.
COMMAND -

OUTPUT -
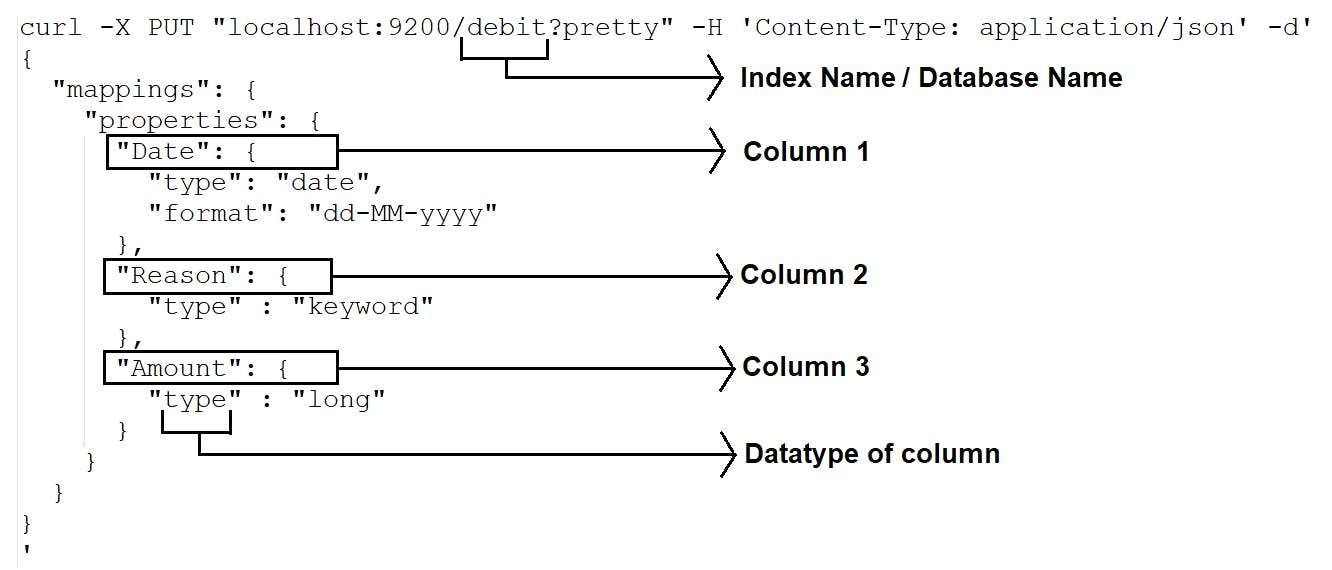
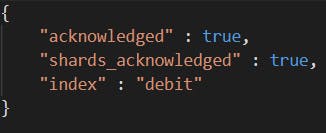
2. CREATE -
Now to create a new database or table you might know that we generally tell the database what type of data our table is going to contain, similarly in elasticsearch it is generally advisable that you tell elasticsearch about the type and form of data you are going to insert before actually inserting the data so that elasticsearch can digest the data accordingly. NOTE: This is not a required step but a good practice.
COMMAND -
OUTPUT -
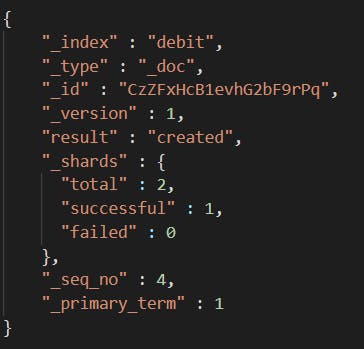
3. INSERT DATA -
COMMAND -
OUTPUT -
5. FETCH ALL RECORDS -
COMMAND -

OUTPUT - It will show all the records. It will be a huge list not relevant here so we'll skip this and move to the exciting part.
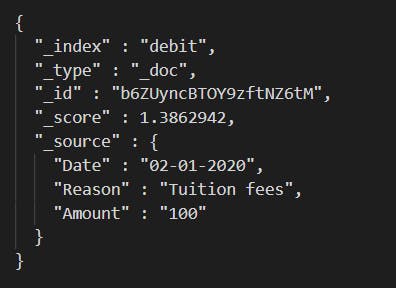
5. SEARCH -
This is where elasticsearch shines. Now to search a particular information we will use different commands with different parameters and just like before everything is explained within the image.
Search 1: Lets first go slow and find out how much money has been deducted from our account for tuition fees -
COMMAND -

OUTPUT -
Search 2: Cool now lets see how much money we got from the loan payed back by our friend.
COMMAND -

OUTPUT -
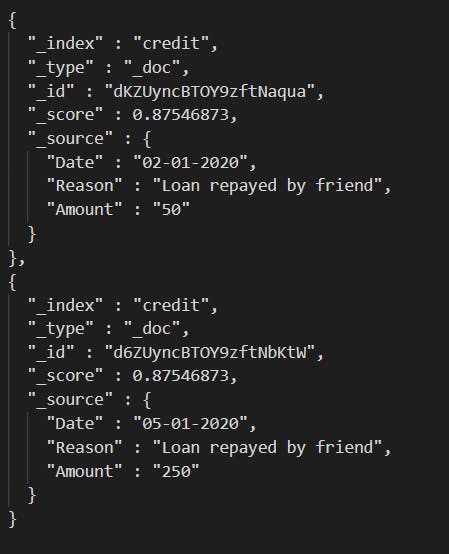
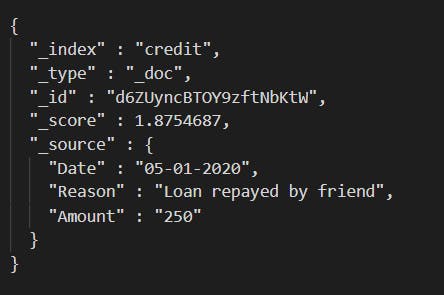
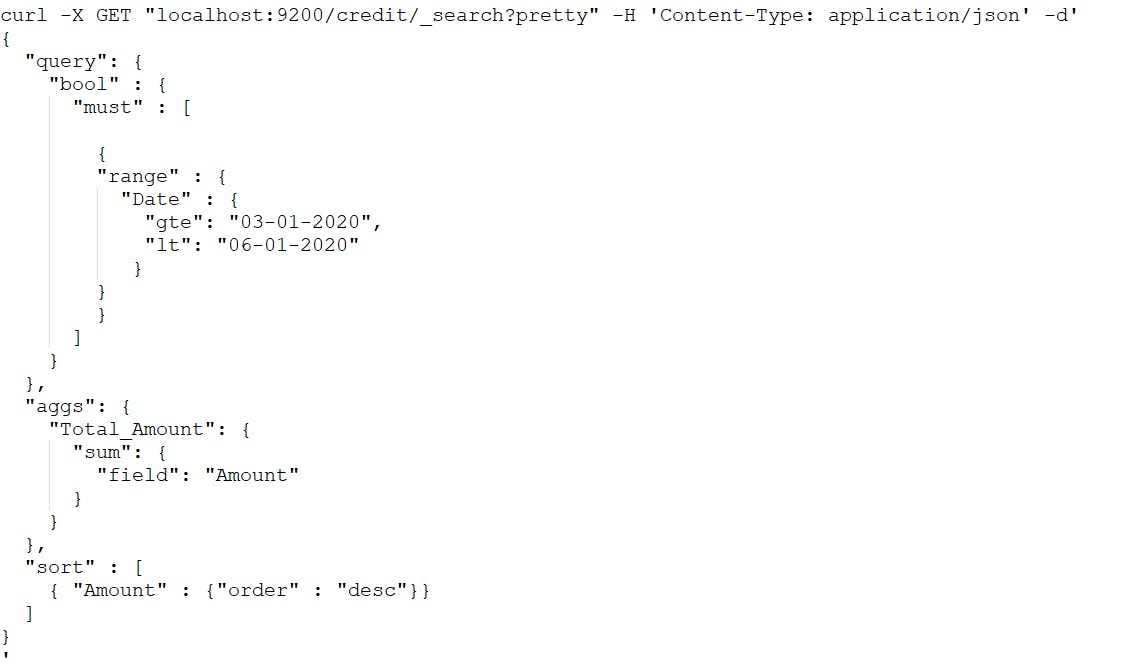
Search 3: OOH 2 transactions! Looks like we can narrow down our search to a particular date.
COMMAND -
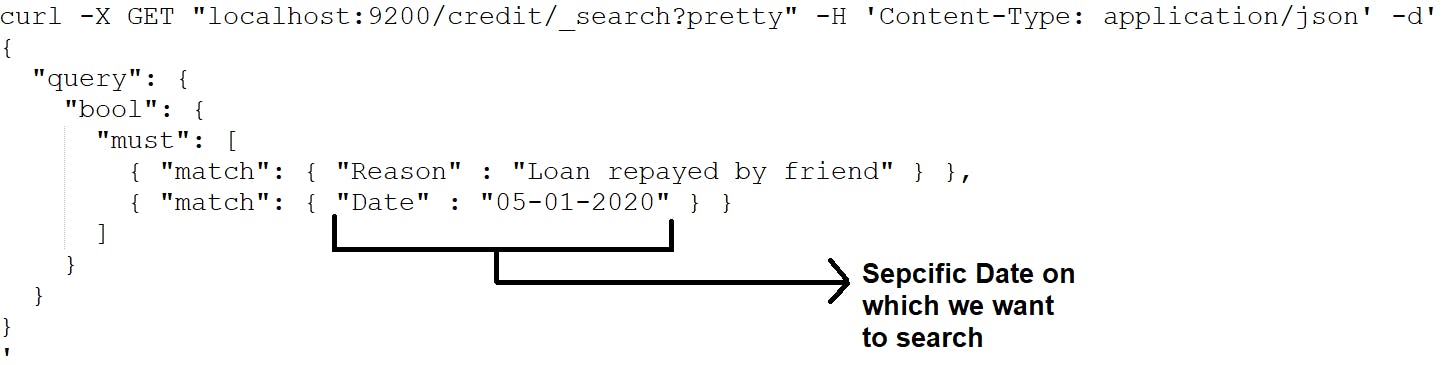
OUTPUT -
Search 4: Did you know you can see results in an ordered way after applying certain conditions? Well now you do. Lets see all money coming into our account in reverse order of value -
COMMAND -
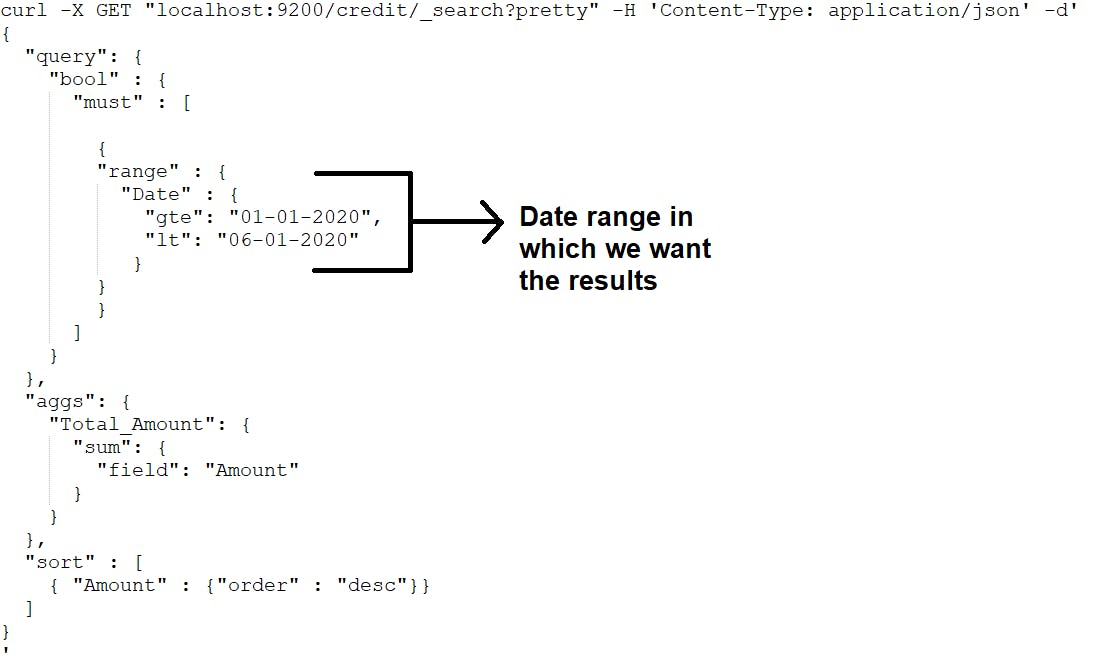
OUTPUT -
Search 5: Okay I accept that was not that exciting but what if you want to find which source is bringing you the most money into your account? Won't it be very useful if we could find that?
COMMAND -
OUTPUT -
 HMM, Looks like we need to give our friend more loan they are giving back huge profits. 😂
Anyway, with this we reach the end of our tutorial. I had fun writing this out for you guys but if you ever feel it was still too technical please reach out to me and tell me what can be improved. Please leave a comment if possible. Thank you for reading.